Thank you for reading my blog posts, I am no longer publishing new content on this platform. You can find my latest content on either mainawycliffe.dev or All Things Typescript Newsletter (✉️)
This is step by step guide about setting up Firebase for your Angular App. This includes using Firebase services from Inside Angular and deploying to Firebase Hosting - optional.
Prerequisite
- A Firebase Project – Learn how to create a new Firebase Project
- Create an Angular Application – Learn how to setup Angular CLI and Scaffold a new App.
Get Configs from your Firebase Project
We are going to require some firebase configs that will allow our Angular App to communicate with Firebase. These are unique to each Firebase Project and I am going to show you how to get them for your Firebase project, by following the steps below:
The first step is to go to the settings of your project. At the bottom of the Projects’ Setting Web Page, you will see a list of “Your Apps” section. If this is a new Firebase project, it will be most likely empty, as shown below.
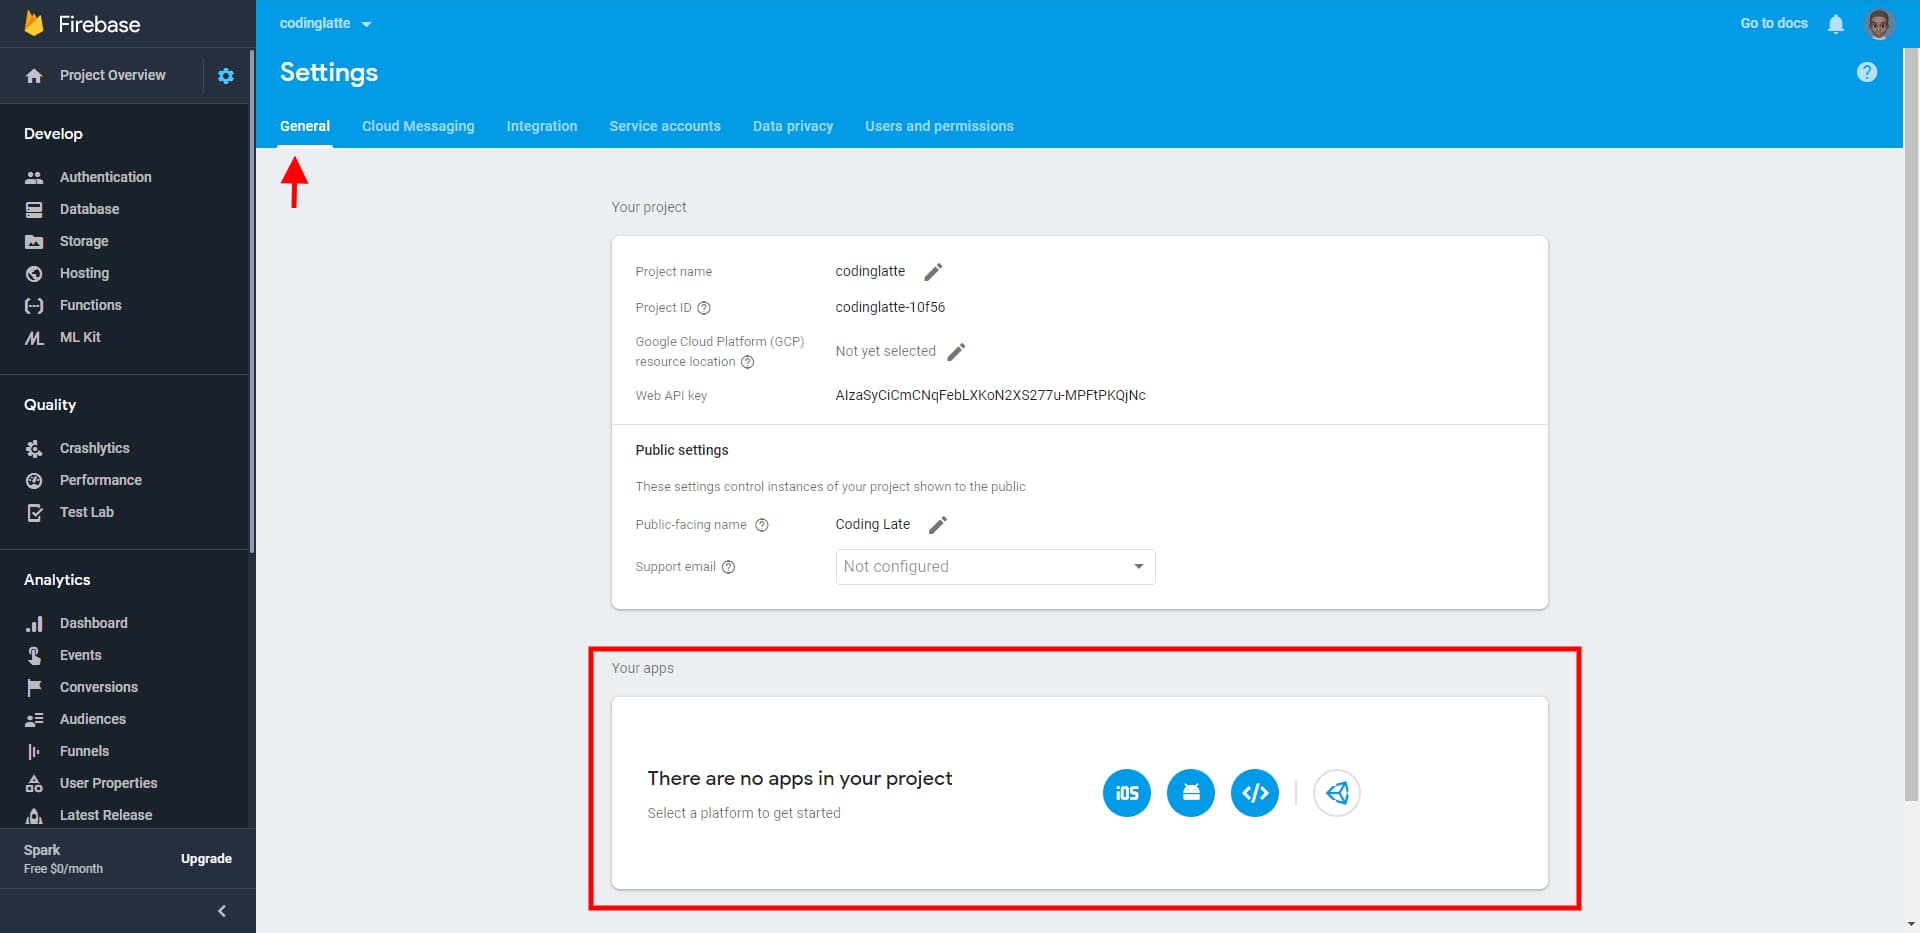
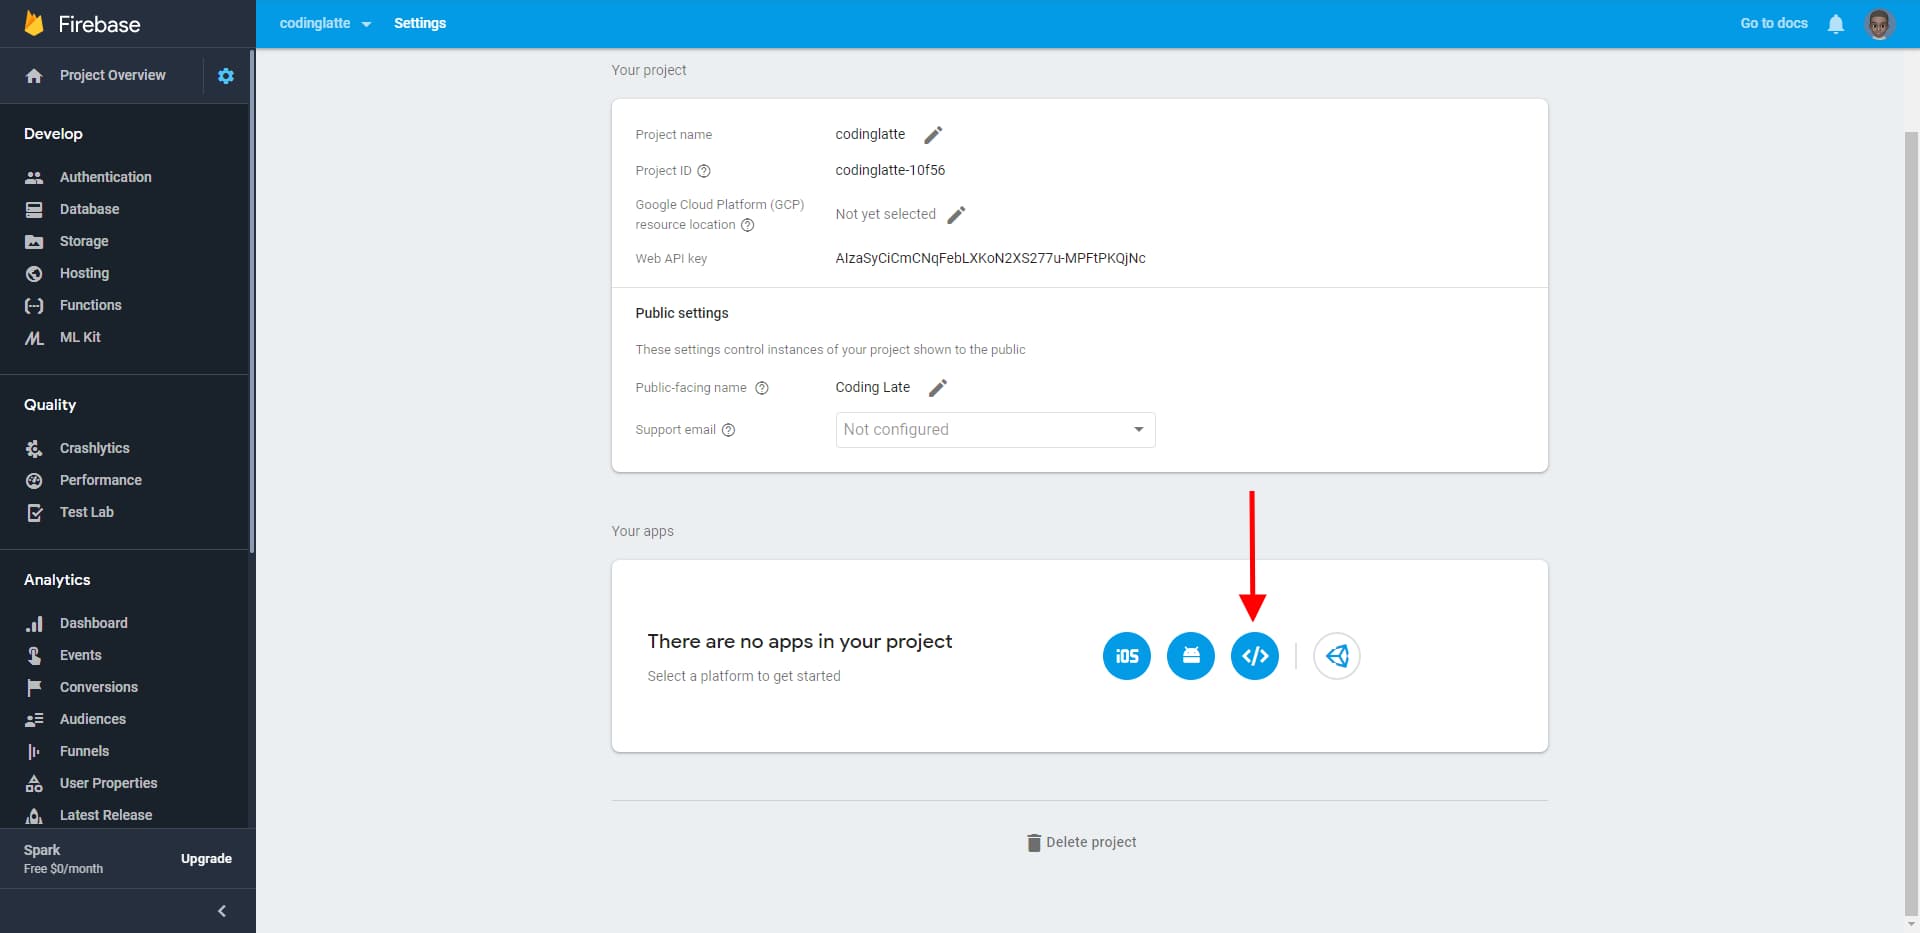
If it’s empty, click on the button highlighted below to create a new Web App and skip to step 5.
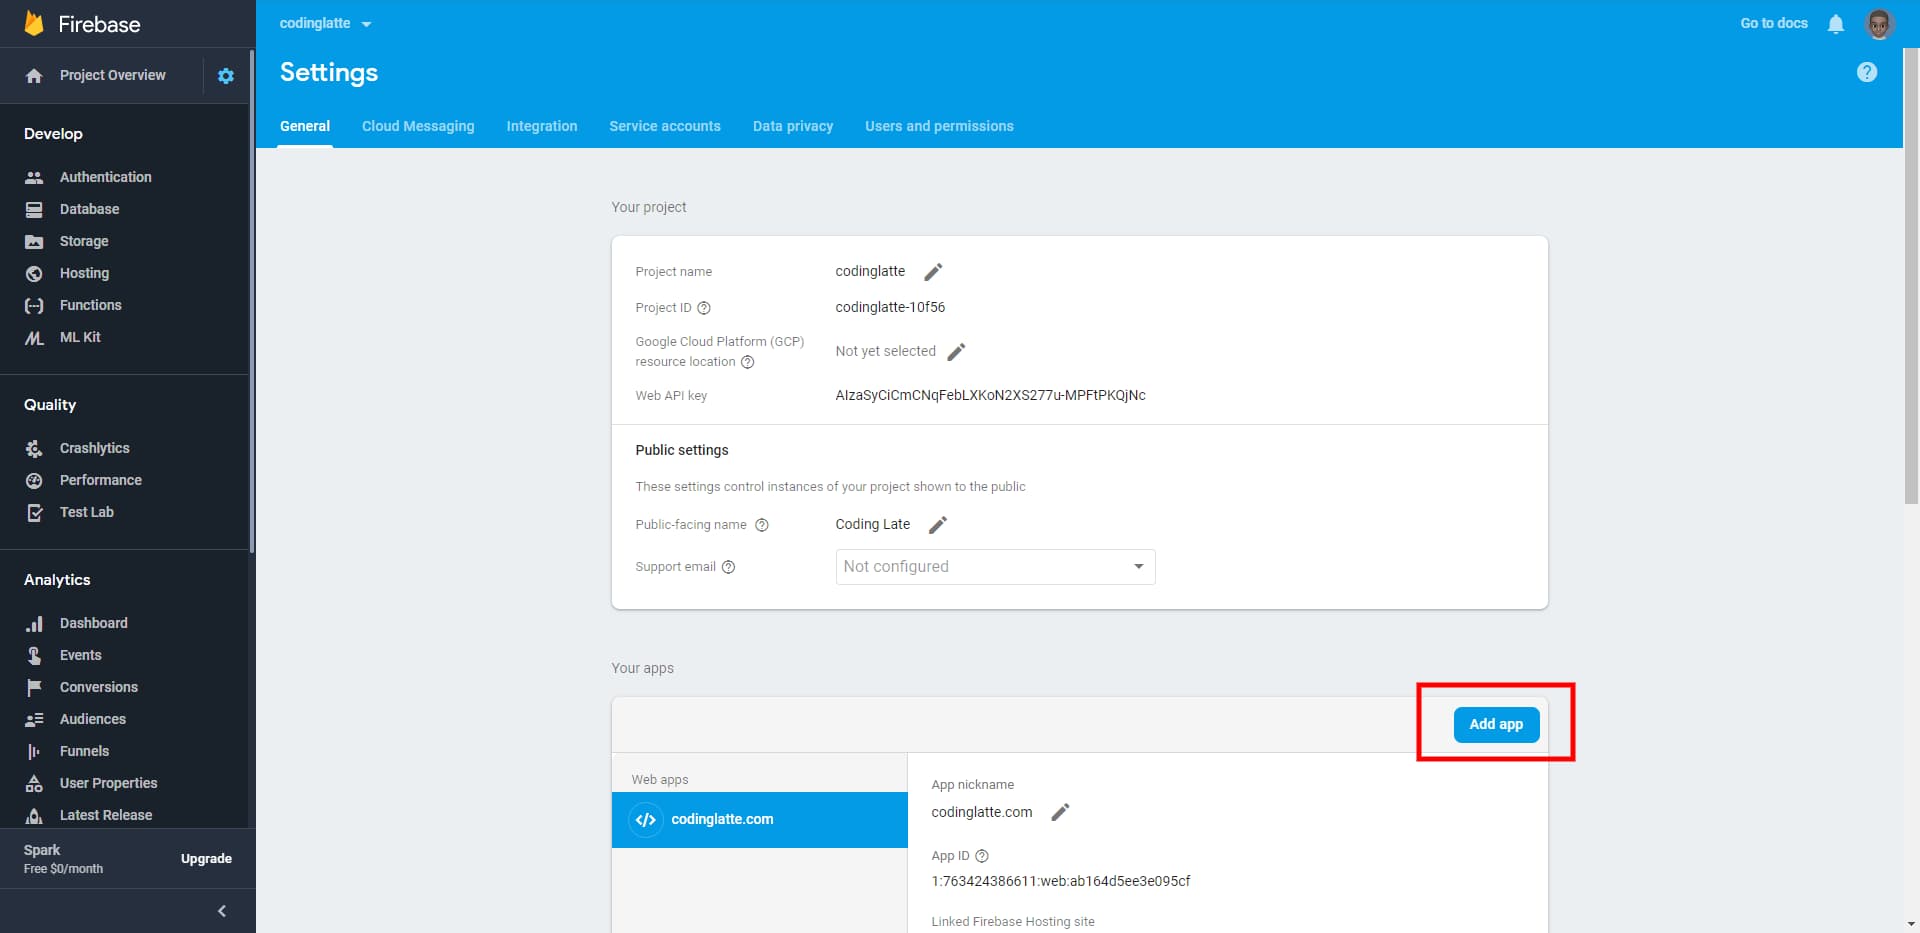
If it’s not empty, click on Add App button, on the top left corner of the Your Apps section.
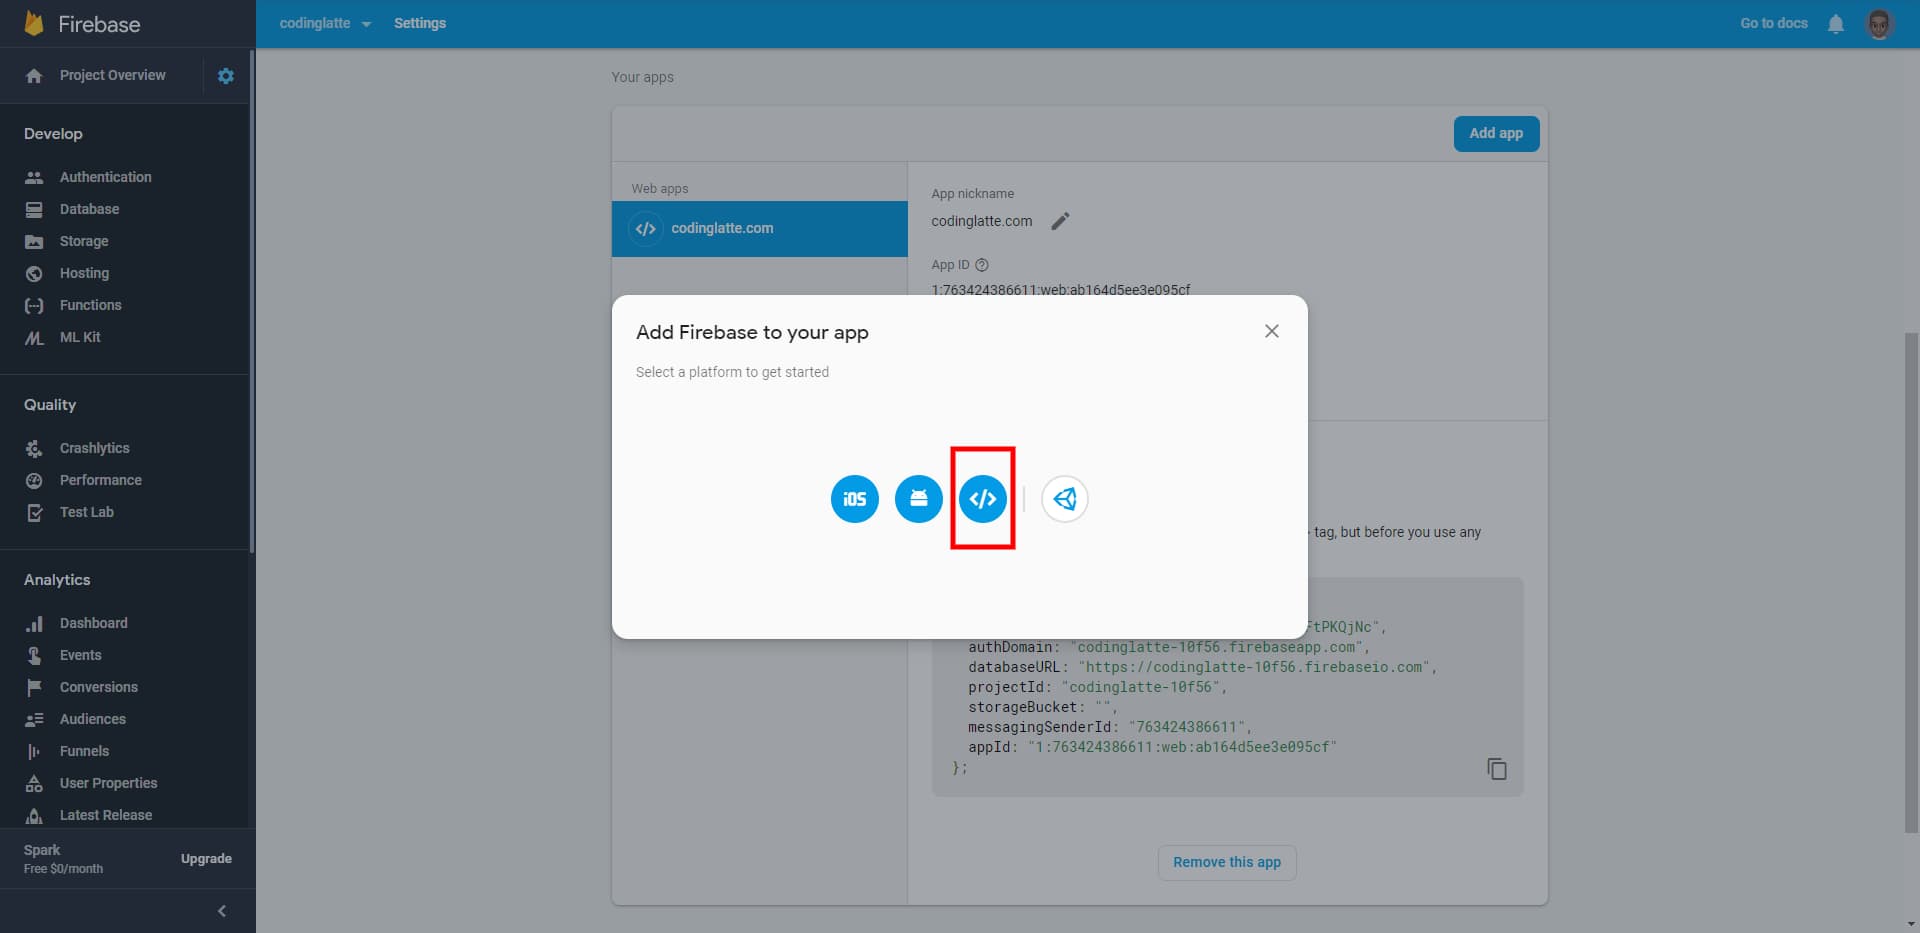
And then click on the button highlighted below to create a new Web App.
In the next step, you will be prompted for the App Nickname and if you would like to host the App using Firebase Hosting, which is optional.
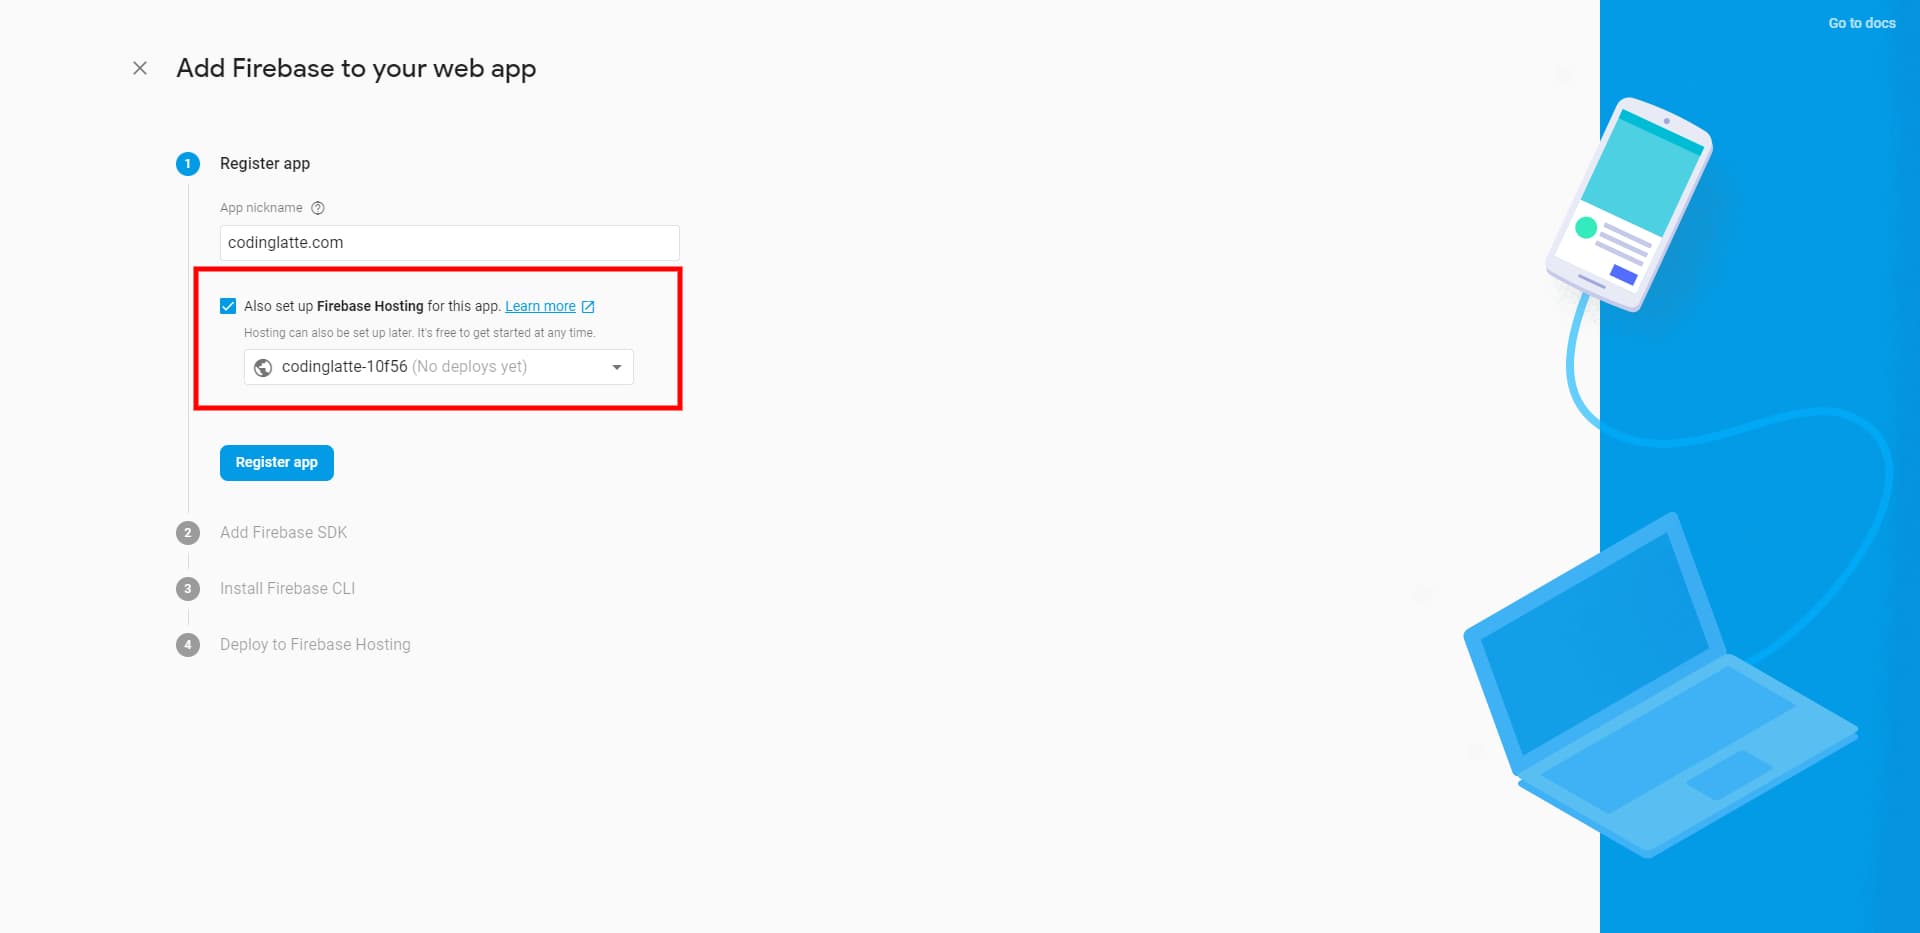
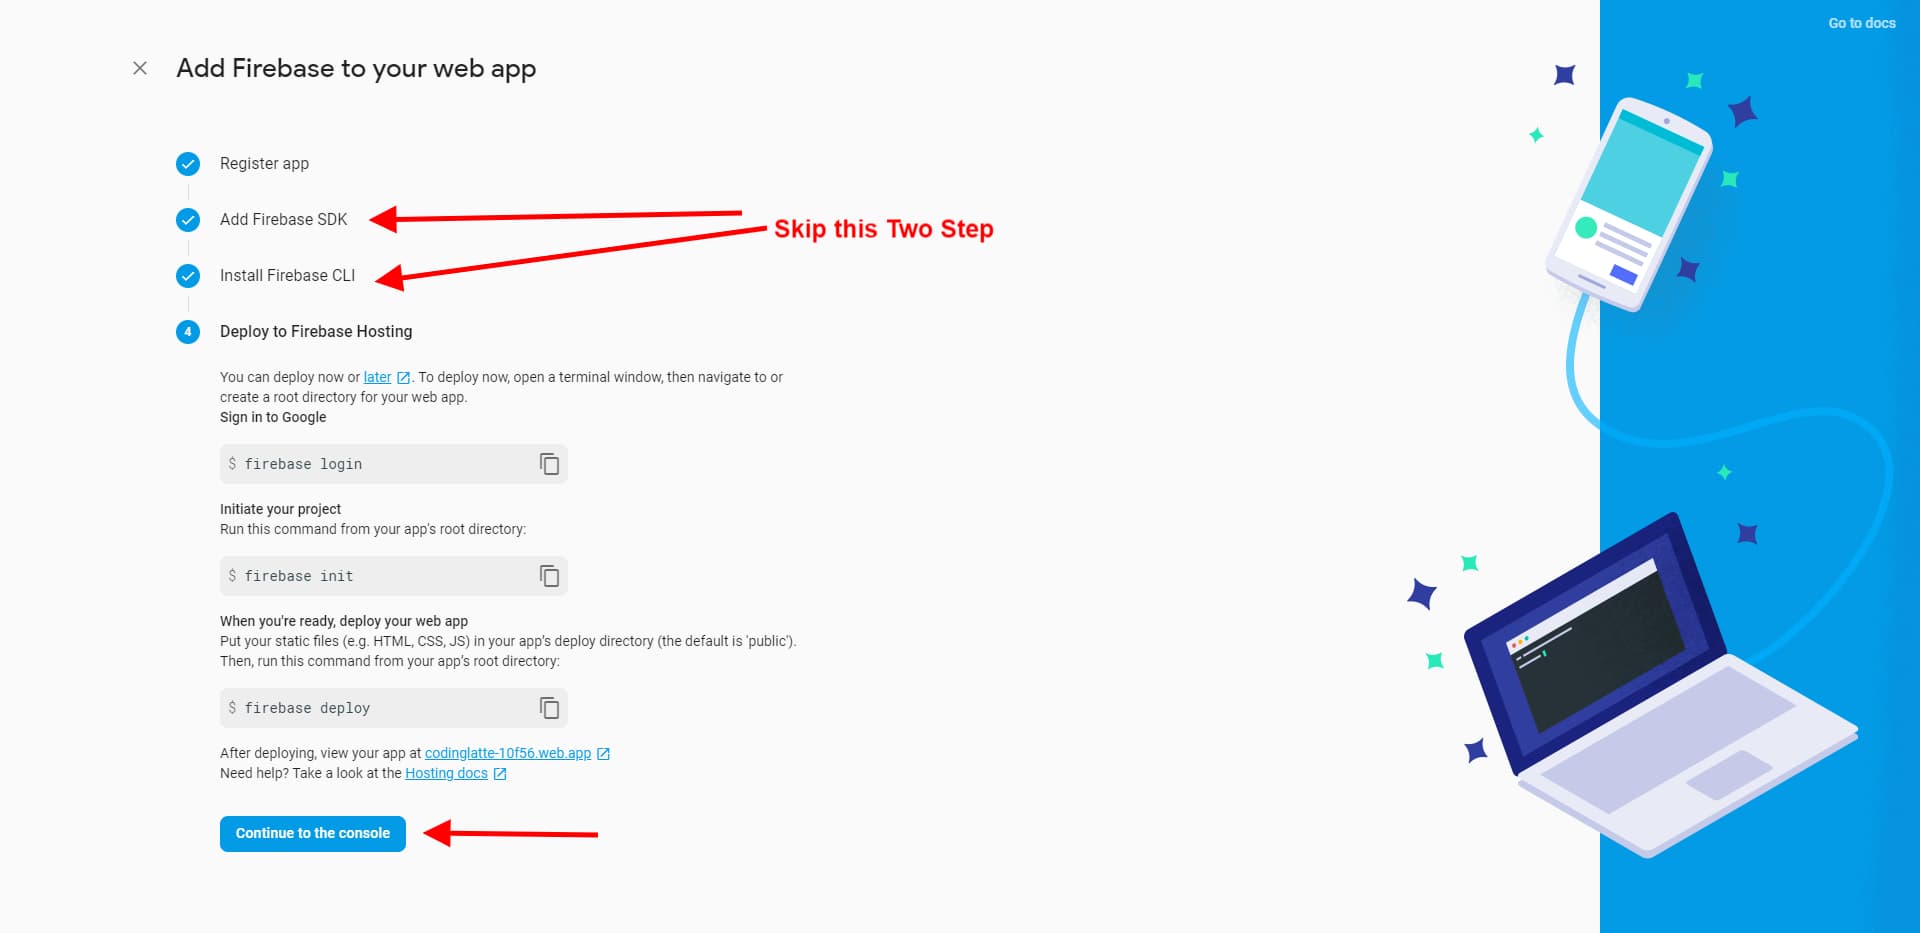
Since we are setting up an Angular App, we are going to skip the next three steps, without doing anything. And in the final step, click on continue to console.
Now you should have at least one app in Your Apps section.
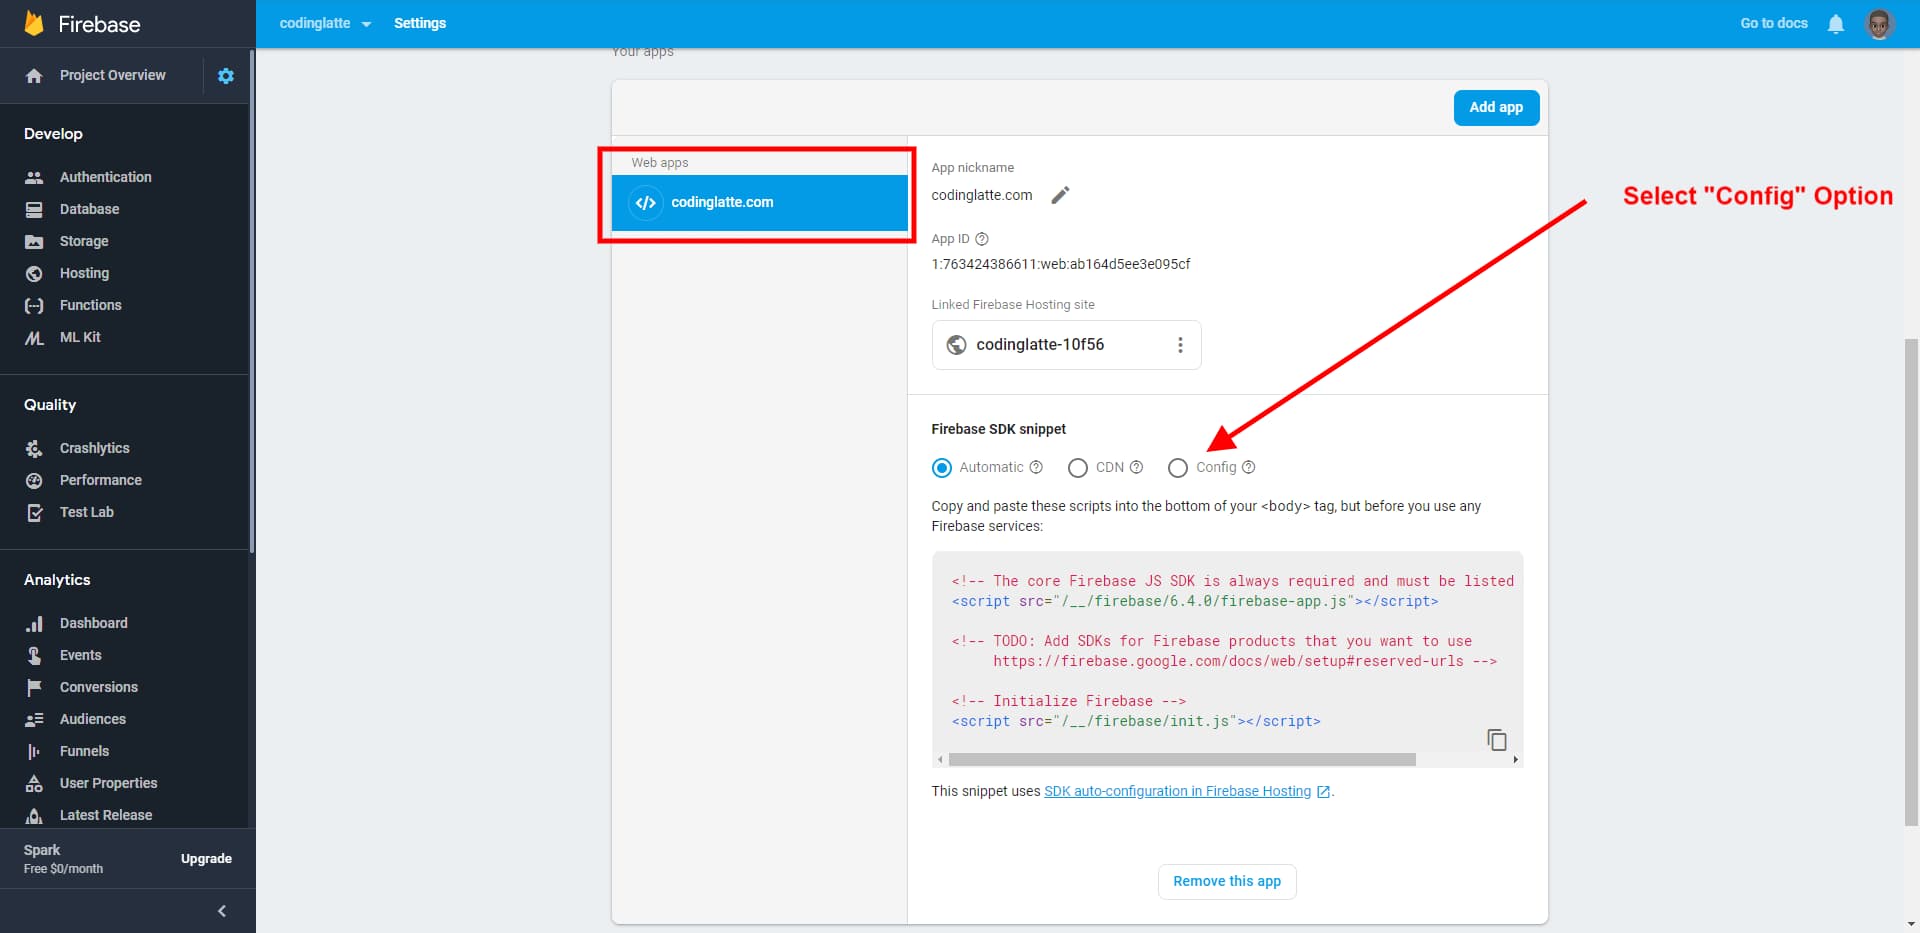
Select the app you just created and click on the config radio button to reveals your Web Apps config.
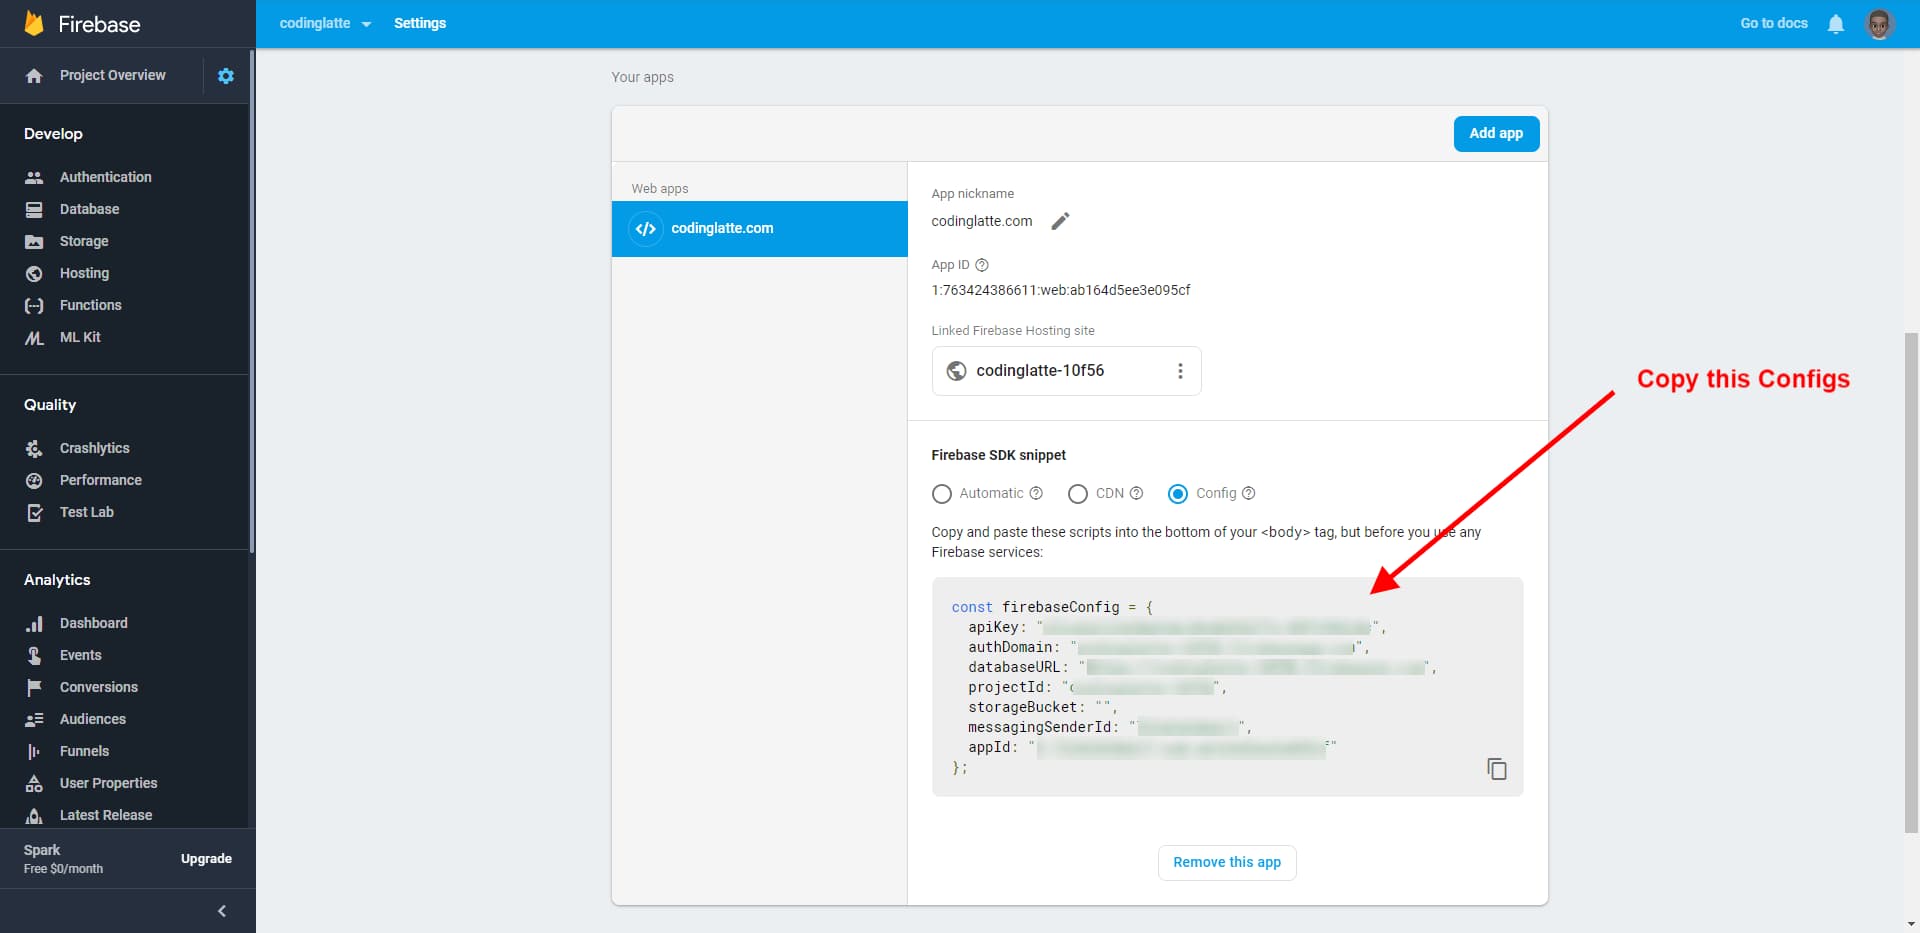
Copy the above config, as we will need to add them to our Angular App in the next step.
Setup your Angular App to use Firebase (And Hosting)
And Firebase Configs
First, inside our environment files (src/environments/*), we need to add the firebase configs we got above. We will add our Firebase project configs to both src/environment/environment.ts and src/environment/environment.prod.ts as shown below:
If you don’t know how environment variables work in Angular, check my previous post that covered the topic here.
export const environment = {
  production: false,
  firebase: {
    apiKey: '[PROJECT_API_KEY]',
    authDomain: '[PROJECT_AUTH_DOMAIN]',
    databaseURL: '[PROJECT_DB_URL]',
    projectId: '[PROJECT_ID]',
    storageBucket: '[STORAGE_BUCKET]',
    messagingSenderId: '[MESSAGE_ID]',
    appId: '[WEB_APP_ID]'
  }
};
Install Dependencies and Enable Hosting
After that, we are going to install @angular/fire using Angular Schematics –@angular/fire is the new name of angularfire2.
ng add @angular/fire
The above command is going to install @angular/fire and then initialize firebase hosting for your Angular App.
Please make sure you have install Firebase CLI and logged in, you can follow the instructions here.
You will be prompted to select the Firebase project you are going to deploy your Angular App to.
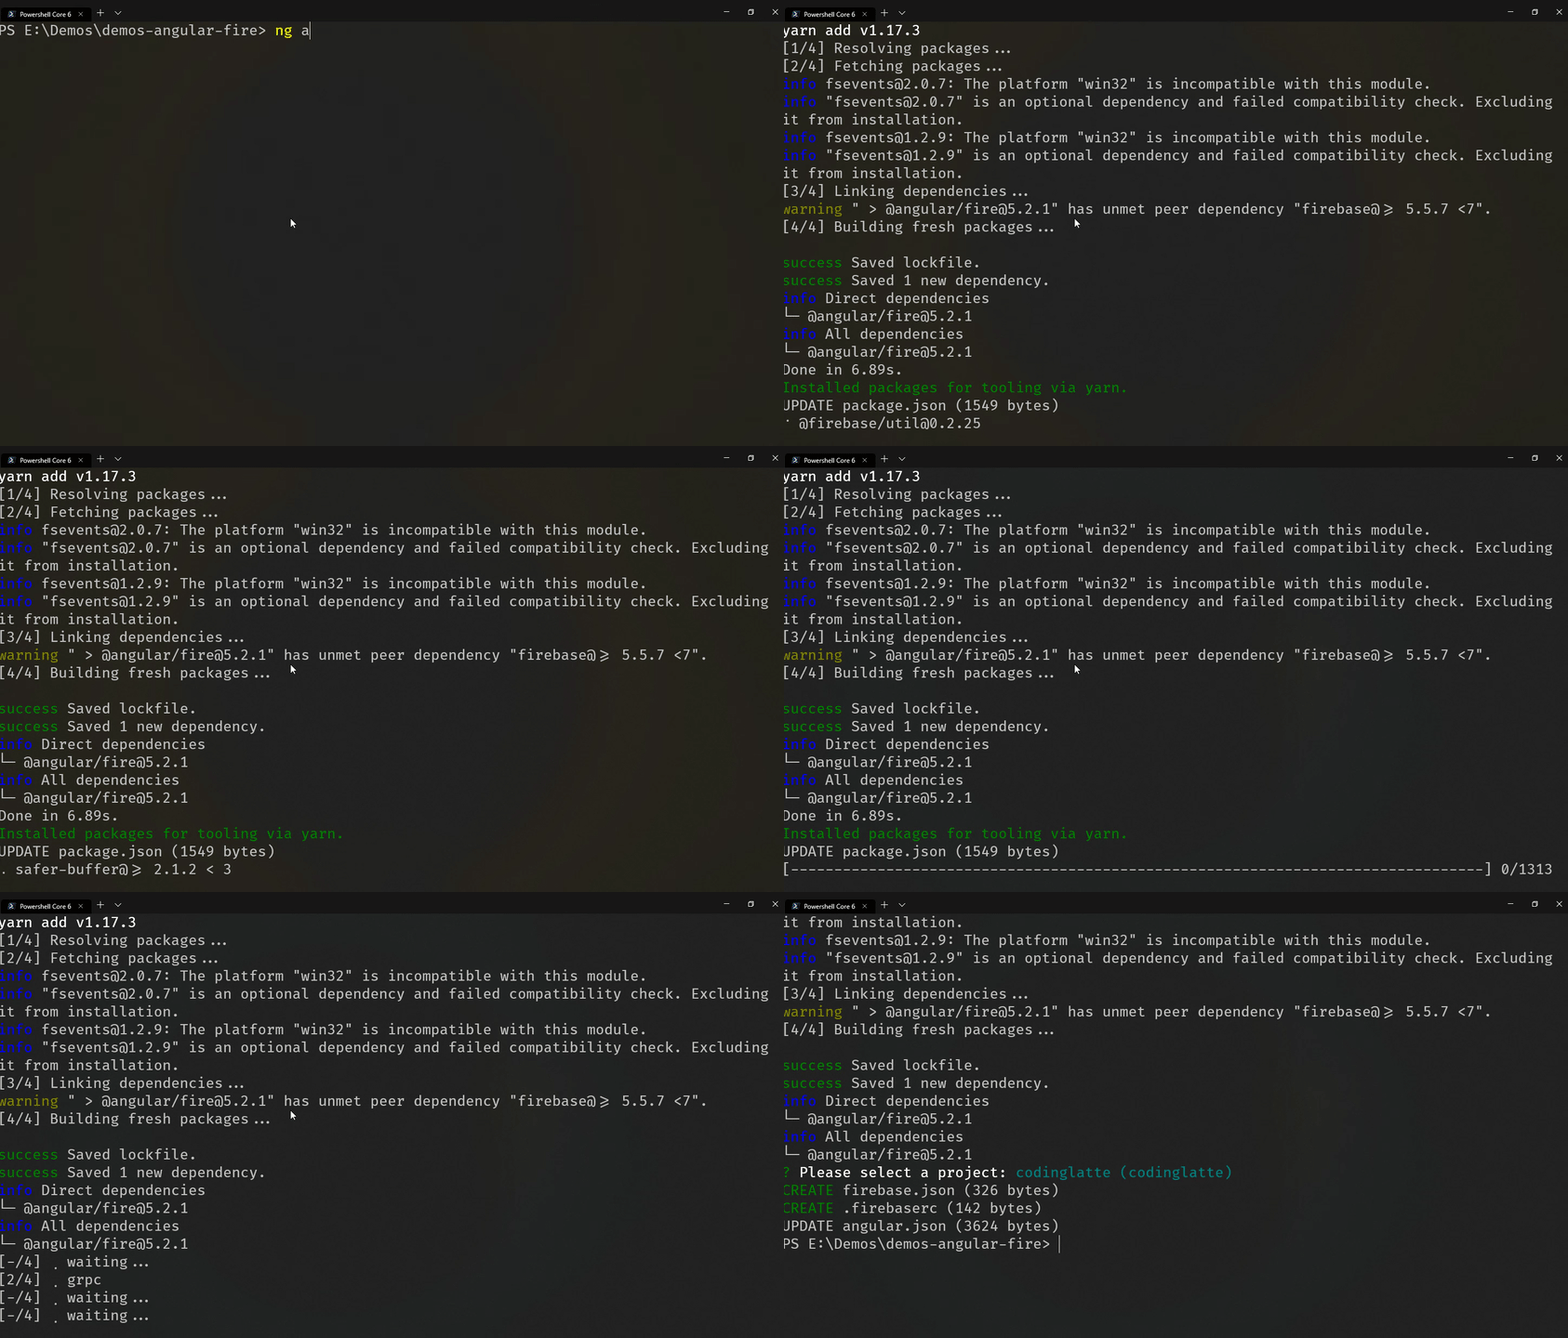
When the above process completes, both @angular/fire and related dependencies will be installed, and Firebase hosting will be initialized for our Angular Application.
Import @angular/fire Angular Modules
Next, let’s import AngularFireModule Ng module - this is required to use any Firebase Services.
import { BrowserModule } from '@angular/platform-browser';
import { NgModule } from '@angular/core';
import { AngularFireModule } from '@angular/fire';
import { AppComponent } from './app.component';
import { environment } from 'src/environments/environment';

@NgModule({
  declarations: [AppComponent],
  imports: [
    BrowserModule,
    AngularFireModule.initializeApp(environment.firebase)
  ],
  providers: [],
  bootstrap: [AppComponent]
})

export class AppModule {}
On top of AngularFireModule, we will need to add individual Angular Modules for @angular/fire that our application needs. Here are list of available modules:
| Module | Description |
|---|---|
| AngularFireAuthModule | Firebase Authentication |
| AngularFireDatabaseModule | Realtime Database |
| AngularFireFunctionsModule | Callable Cloud Firebase Function |
| AngularFirestoreModule | Firebase Cloud Firestore |
| AngularFireStorageModule | Firebase Cloud Storage |
| AngularFireMessagingModule | Firebase Cloud Messaging |
Here is how you can import all of them:
import { BrowserModule } from '@angular/platform-browser';
import { NgModule } from '@angular/core';
import { AngularFireModule } from '@angular/fire';
import { AngularFirestoreModule } from '@angular/fire/firestore';
import { AngularFireStorageModule } from '@angular/fire/storage';
import { AngularFireAuthModule } from '@angular/fire/auth';
import { AngularFireMessagingModule } from '@angular/fire/messaging';
import { AngularFireDatabaseModule } from '@angular/fire/database';
import { AngularFireFunctionsModule } from '@angular/fire/functions';
import { AppComponent } from './app.component';
import { environment } from 'src/environments/environment';

@NgModule({
  declarations: [AppComponent],
  imports: [
    BrowserModule,
    AngularFireModule.initializeApp(environment.firebase),
    AngularFirestoreModule,
    AngularFireAuthModule,
    AngularFireStorageModule,
    AngularFireMessagingModule,
    AngularFireDatabaseModule,
    AngularFireFunctionsModule
  ],
  providers: [],
  bootstrap: [AppComponent]
})

export class AppModule {}