Thank you for reading my blog posts, I am no longer publishing new content on this platform. You can find my latest content on either mainawycliffe.dev or All Things Typescript Newsletter (✉️)
In a previous post, we covered how to use multiple dockerfile to target different environments for an angular app. In this post, we are going to take things a bit further along using docker compose. We shall use multiple docker compose configuration files to override the defaults in the main configuration files when deploying to different environment.
This means that, if we have 3 environment – development, staging and production environment, we shall have four docker-compose configurations file. The main docker-compose.yml, shall contain only base configuration common to all our environments. Then we shall have other 3 docker-compose configuration files for each of our environments: docker-compose.override.yml, docker-compose.staging.yml and docker-compose.prod.yml.
The 3 extra docker compose files shall be used to override base configuration contained in the main docker compose configuration file. This means, if you can launch an angular app on different ports depending on environment, use different dockerfiles and different images and container names etc. The last point is especially useful since it means you won’t accidentally deploy a staging image into production environment because they have similar names.
Docker compose by default, will read both the main configuration file and docker-compose.override.yml if it’s available. So, when deploying to the other two environments, you can specify the override file to use. You can learn more about using multiple docker compose files here. And to make things easier, we shall add the docker compose build commands into our list of scripts in package.json. Without further ado:
Getting Started
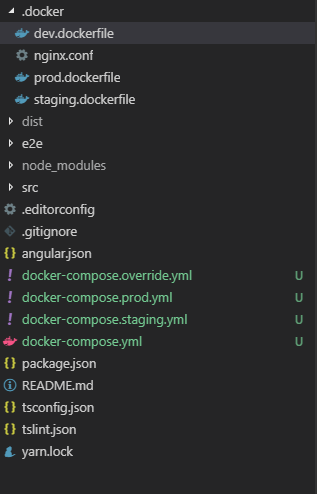
On the previous post, here, we covered how to build images and using multiple dockerfiles. In this post, we are going to be building on that and add docker compose to our project. If you can recall, all our docker files and related docker files, are in a directory at the root of our angular workspace called .docker.
We are now going to add 4 extra docker compose configuration files at the root of our angular workspace. The files will be name docker-compose.yml, docker-compose.override.yml, docker-compose.staging.yml and docker-compose.prod.yml.
Next, we are going to add docker configurations for each file specific to the environment we targeting:
Base Confuguration – docker-compose.yml
This shall contain common configurations between our three environments. Although, any configurations you add here, can easily be overridden by the environment compose configuration files such as docker-compose.override.yml. So, it is also possible to add default configurations here and override them when necessary. For this configuration, we shall only have a default docker file.
version: '3'
services:
  demongapp:
    build:
      context: .
      dockerfile: .docker/prod.dockerfile
      # other services here like API, Database ETC
Next, let’s extend or override this compose configurations for local development.
Local Development and Testing
For Local Development, we shall use the docker-compose.override.yml file to override default compose configurations. The good thing about using this file, is that you don’t need to specify it during docker compose build. It will automatically read it and override it if it is available.
So, in our case, we need to provide a name for our image and container, launch it on port 8080 and use the development dockerfile instead of the production dockerfile. This is how our docker compose override will look like after we provide the above information:
version: '3'
services:
  demongapp:
    build:
      context: .
      dockerfile: .docker/dev.dockerfile
    image: demongapp-dev
    container_name: demongapp-dev
    ports:
      - 8080:80
NB: You might want to mount your app distribution folder, to avoid building your container every time you build your app after making changes. When building your app, with a mounted app distribution directory, you must specify the
--delete-output-path falseflag. This flag tells angular cli not to delete app distribution directory.
ng build --delete-output-path false
NB: Remember your app distribution directory, is a directory whose name is the app name located inside the
distdirectory at the root of your angular workspace.
Now, if you run docker-compose up –build, it will automatically read both the base compose configurations and override it automatically. No need to have complicated build commands for local development, unlike the other two environments. Now, let’s move on to the next two environments.
Staging and Production Deployments
I am going to discuss this two together, as there is no difference in approach on how to implement both, unlike in local deployment. The only difference are the names for our images and containers. So, our staging compose configurations will look like this:
version: '3'
services:
  demongapp:
    build:
      context: .
      dockerfile: .docker/staging.dockerfile
    image: demongapp-staging
    container_name: demongapp-staging
    ports:
      - 80:80
And our production compose configurations will look like this:
version: '3'
services:
  demongapp:
    build:
      context: .
      dockerfile: .docker/prod.dockerfile
    image: demongapp-prod
    container_name: demongapp-prod
    ports:
      - 80:80
Now to instruct docker compose to build and deploy our image for staging, we use the following command:
docker-compose -f docker-compose.yml -f docker-compose.staging.yml up -d –build
It is quite long and hard to remember. Please note, we are specifying two configuration files, the main docker-compose and an override for staging docker compose. And the same goes for production environment:
docker-compose -f docker-compose.yml -f docker-compose.prod.yml up -d –build
Using NPM Scripts to Shorten the Commands
Now, to make these commands to remember, you can use NPM scripts to run these commands. Open package.json, at the root of your angular workspace, and add the two scripts, one for deploying in staging and another for deploying production environment.
"scripts": {
    // ...
    "deploy-staging": "docker-compose -f docker-compose.yml -f docker-compose.staging.yml up -d --build",
    "deploy-prod": "docker-compose -f docker-compose.yml -f docker-compose.prod.yml up -d --build"
    //...
}
And now, you can run the above scripts as shown below:
- Staging:
$ npm run deploy-staging
- Production:
$ npm run deploy-staging
Source Code
You can find the whole code for this project here.